

1
On the Home page, click Create Project
The New Project page opens, with the wizard steps shown across the top: Create Project, Install, Verify, and Invite your Team.
2
Paste your website URL and click Start
To review a file instead of a website, use the Figma, Videos, Images, Lottie or PDF buttons below the URL field. See How to Upload a File.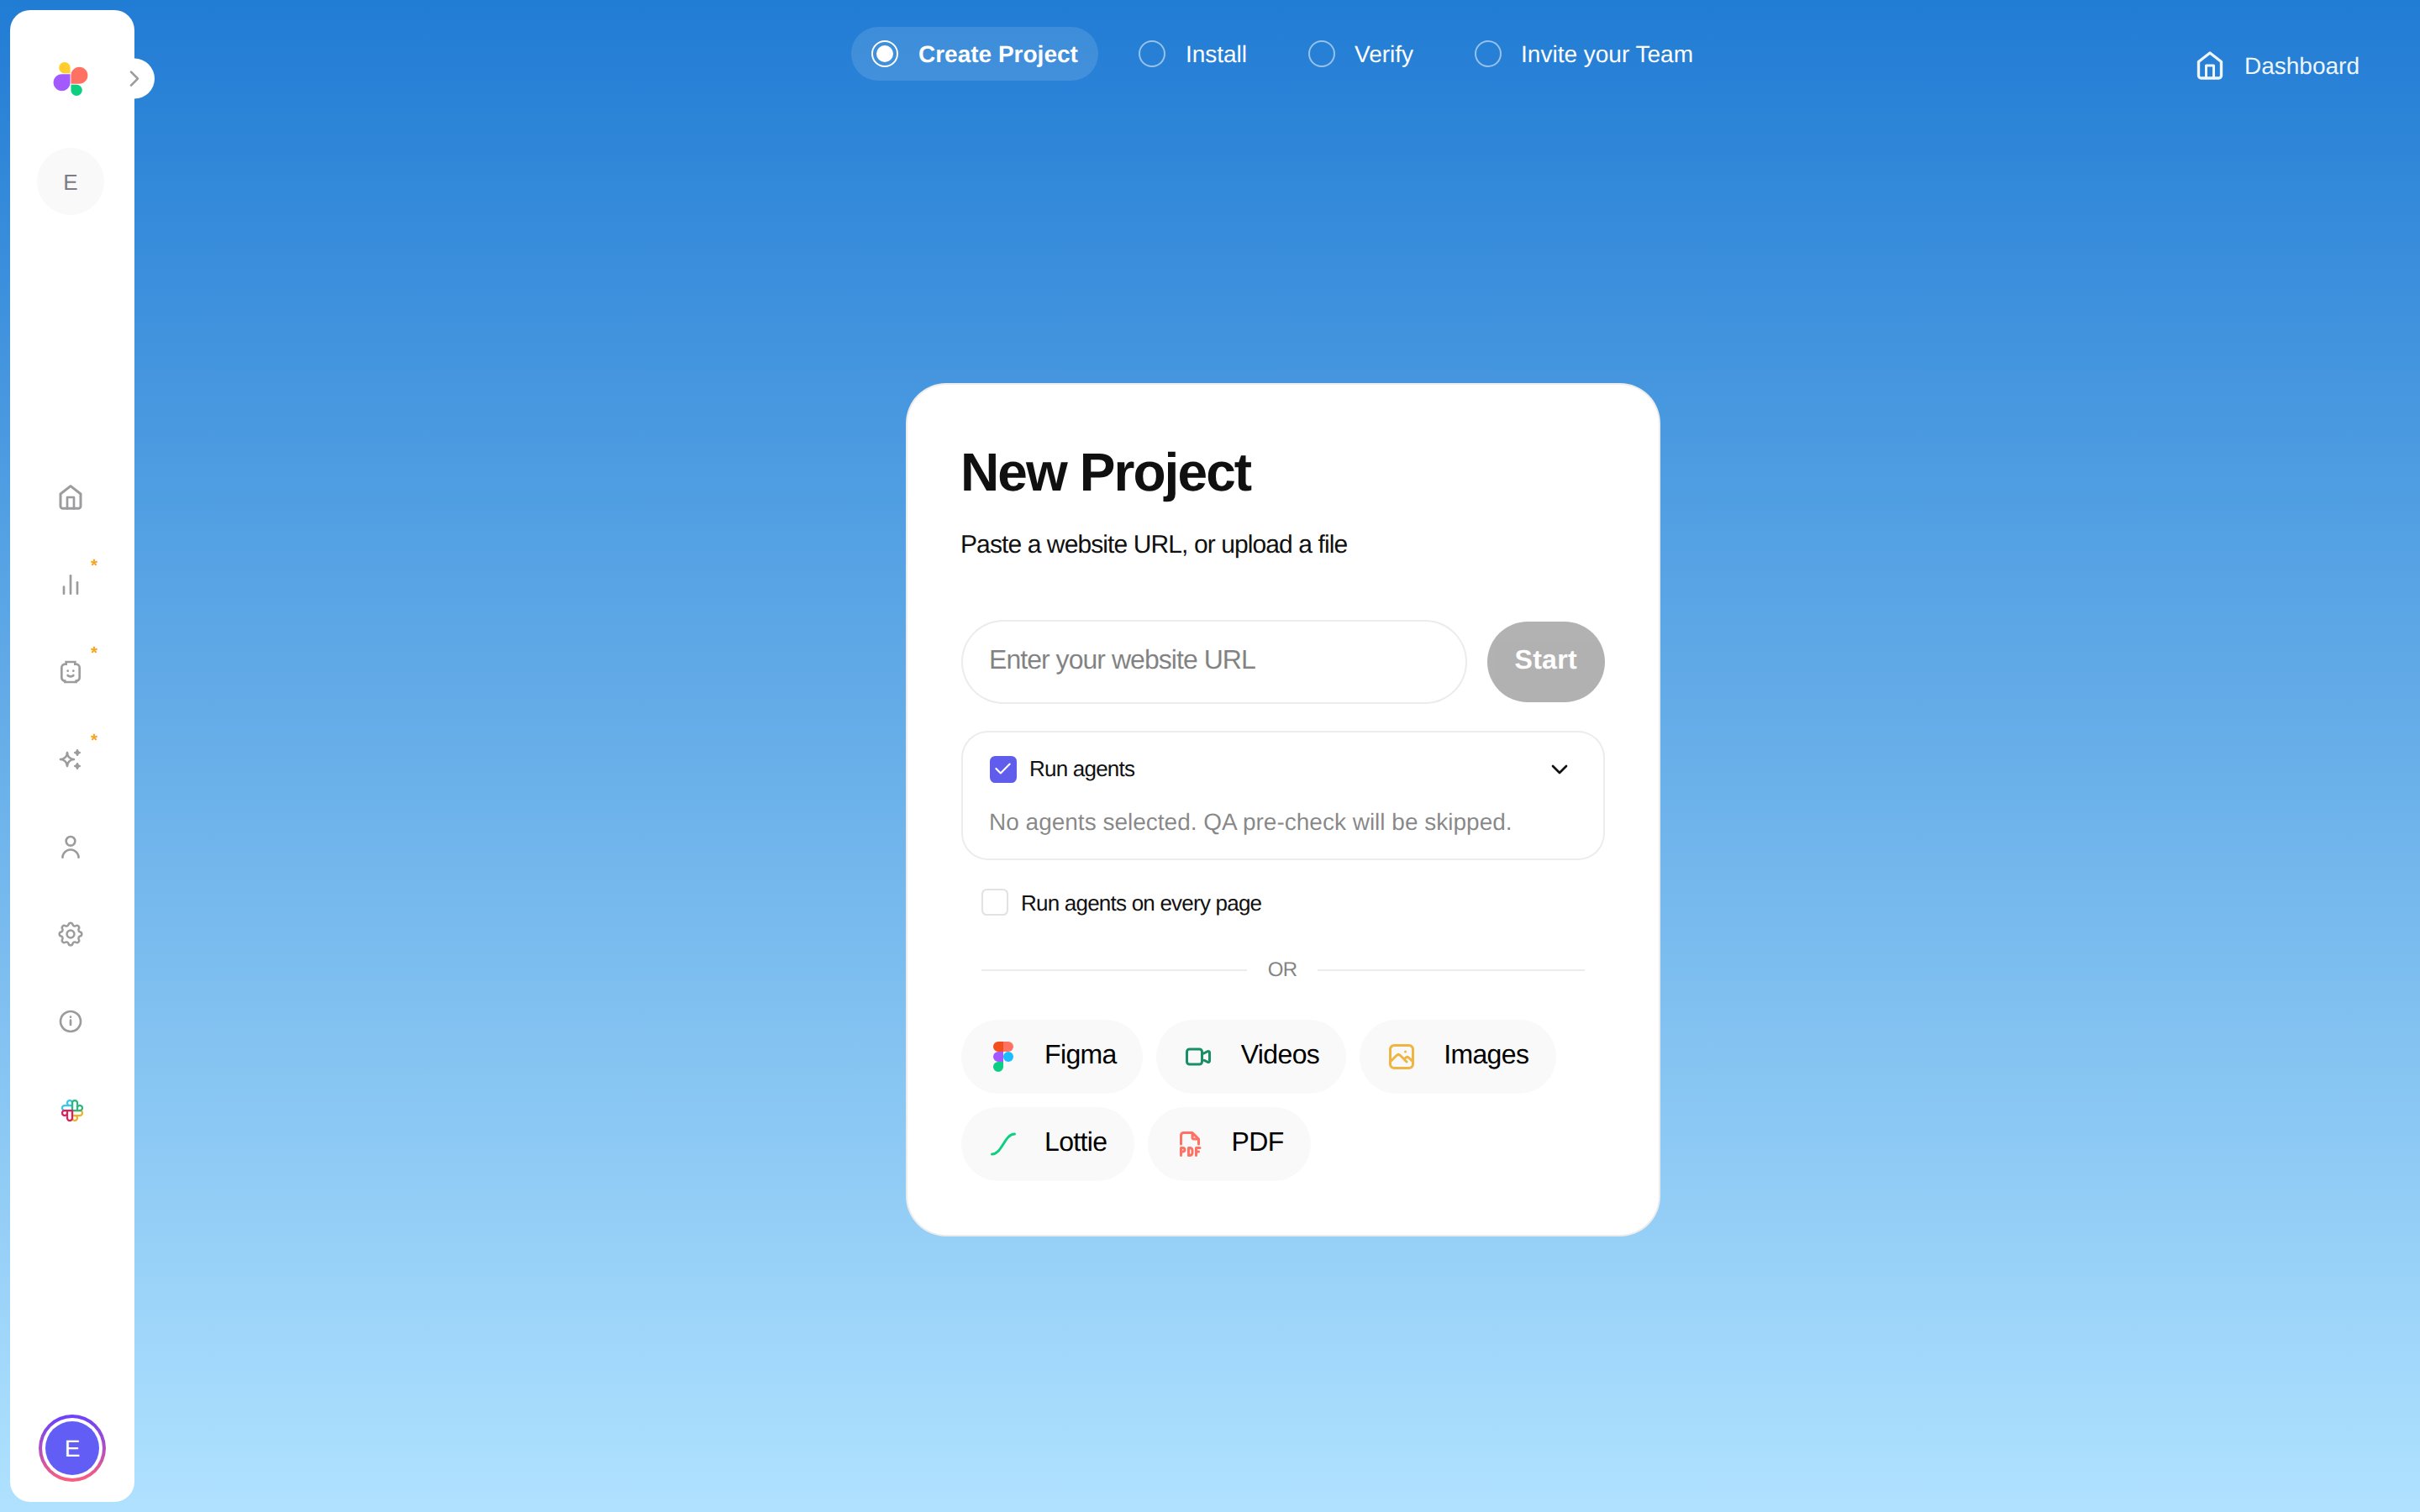
3
Install the script on your site
Pick your platform at the top of the install card: HTML (copy the raw snippet), WordPress, Webflow, Google Tag Manager, Shopify, or Framer. Other Guides covers Elementor, Wix, Bubble, HubSpot, Squarespace, Drupal and more. The right side shows a live preview of your site with the toolbar already on it.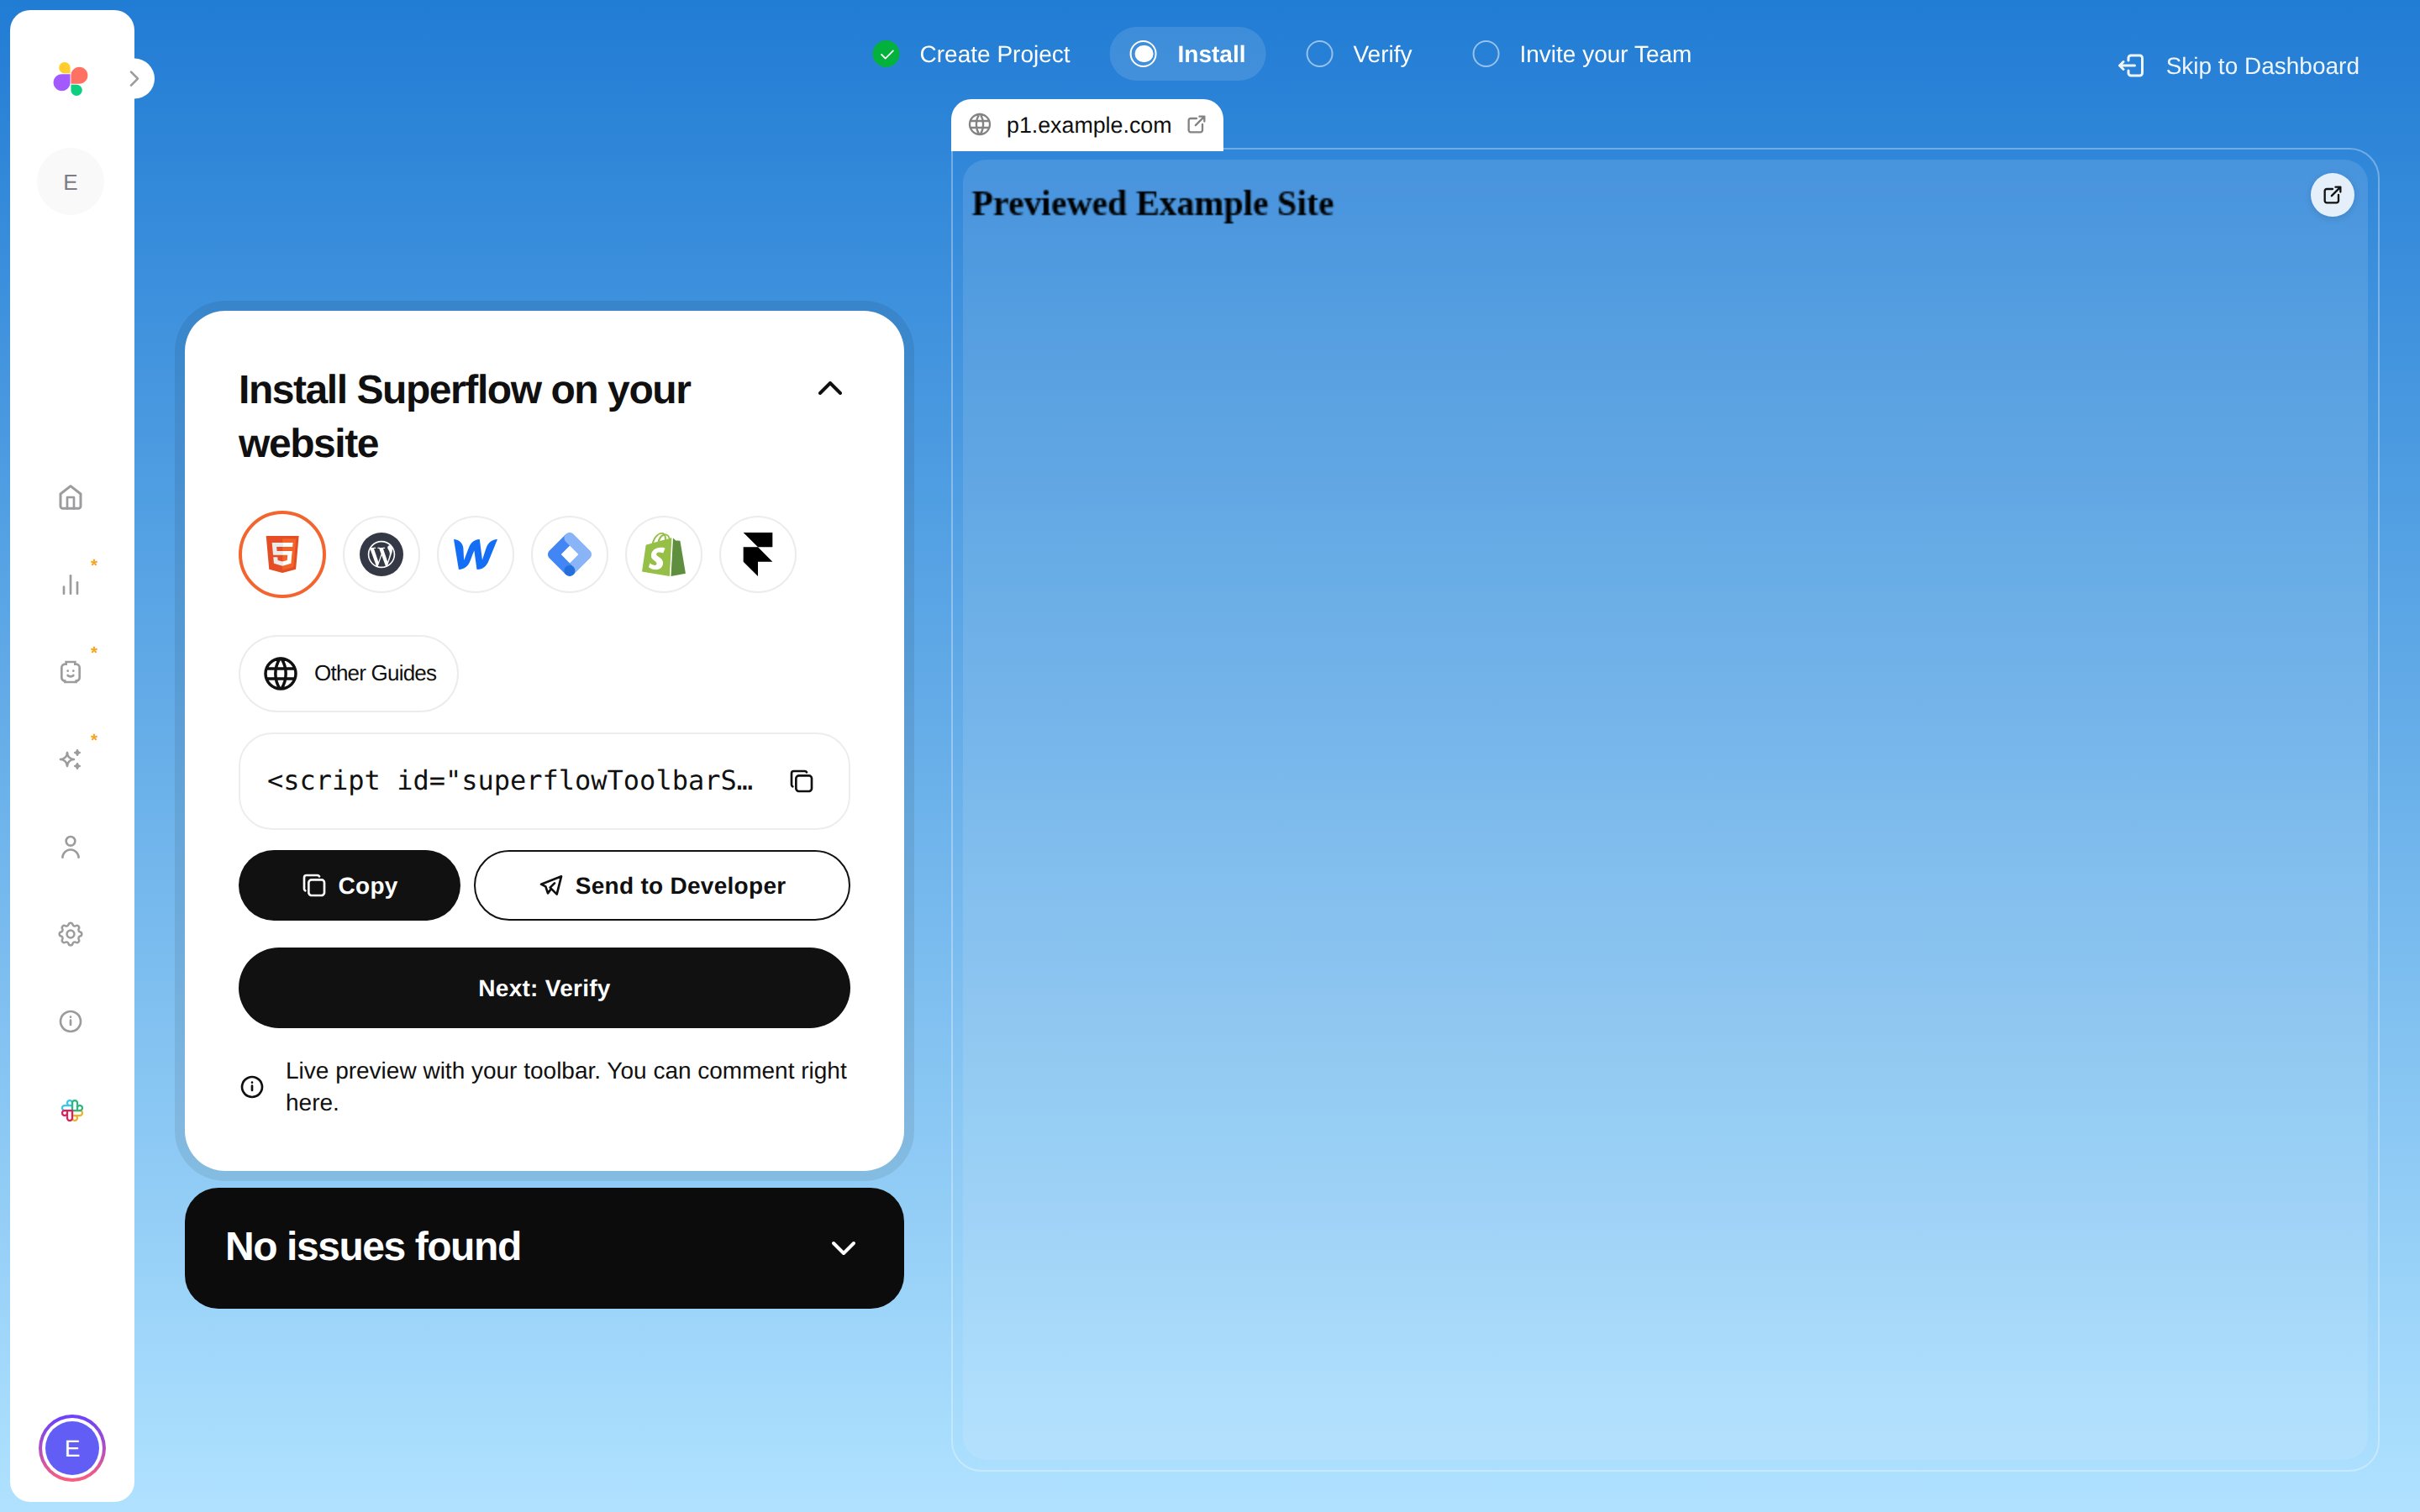
4
Click Next: Verify
Superflow checks your published site every few seconds and confirms as soon as the script is live. If it cannot verify, make sure the site is published and publicly reachable.
5
Invite your team
Add teammates or clients by email, then click Go to Project. You can always invite more people later from the Users page.
?review=true at the end of the URL to start commenting.